Today, we are going to use a slightly different recipe from our first, basic bread dough recipe. However, the principles of that post still apply. I am sure that a lot has probably been written about Italian bread, variations on it, and treatises on what makes Italian bread different from other breads. I haven’t read those things. Or, if I have, it’s been a very long time. For me, the fundamental difference between Italian bread and other breads is that there is olive oil in the dough. And that makes all the difference.
I often make Italian baguettes rather than plain, simple, French baguettes for a couple of reasons. First, it’s pretty easy to add olive oil to a recipe. Second, the presence of the olive oil transforms both the dough and the bread: It’s wonderful to work with and wonderful to eat. The fat transforms the crust as well, into a crisp and flaky delight. So, if you would rather make French baguettes, you can follow the instructions here for forming the loaves, just use the plain recipe from the post I linked to above.
I feel that I have to add a caveat to this post. The recipe I provide here will give you a very tasty bread. But if you get a little obsessed with making bread and and perhaps develop a craving for authenticity, then you should really read Nancy Silverton’s book Breads from the La Brea Bakery. This book will walk you through growing your own sourdough and leavening bread without any commercial yeast. If you follow the instructions, you will get a bread as delectable as you could find anywhere else. It’s a lot of time and work, but well worth the effort.
But for our purposes, we are going to keep life simple. I do highly recommend that if you become a somewhat regular bread baker, you should acquire both a baking stone (or a pizza stone) to ensure even oven temperatures, and a spray bottle of water. We will be using both today, so if you don’t have those things, I’ll try to give tips for improvising.
Recipe
1 1/2 cups lukewarm water
1/2 cup olive oil
2 T yeast
2 T sugar
1 1/2 T salt
6 cups flour
Yield: 2 baguettes
If you want to, you can knead two-to-four teaspoons of rosemary into your dough while you are kneading it the SECOND time (after the first rise). That adds a lovely, authentic flavor to the bread.
__________________________________________________________________________________________
Follow the instructions in this post for activating your yeast, mixing, and kneading your dough.
Shaping
After you have let your dough rise (preferably twice, punching it down once and then letting it rise again), you will punch it down once more and let it “rest” for ten minutes. During this time, pre-heat your oven to 500 degrees. If you use a baking stone, it should be in the center of your oven on a rack.
Resting prevents the dough from tearing when you start to handle it. You are going to divide your dough in two, by picking it up and squeezing it in the middle until the dough can be easily separated. Cover one of the sections in your mixing bowl. Spray a cookie sheet with cooking spray, and find a clean, flat surface for your dough. (Confession: I am lazy, so I usually just use the cookie sheet I’m going to bake it on).
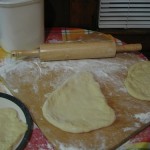
 You are going to flatten your dough into a disk. You can even roll it flat with a rolling pin, but I don’t usually want it quite THAT flat, so I just use it with my hands. You don’t want it to be flat like a pie crust; just flat like a fat piece of pita bread. So, pat it flat with your hands. Then, you are going to fold up one side of the disc, and fold the other side over the top of the first folded end, like an envelope or a letter that is about to go into an envelope.
Then, you will use your hands to roll the dough, as folded, into the size baguette you want: You will want these to be a little fatter than what you think of with a French baguette.
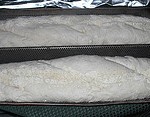
Once you’ve shaped your baguettes, you will want them to rise again (proofing the dough). I usually put them on the stove top where the oven is already heating, so they will benefit from some of that warmth. It’s also a good idea to lightly lay a dampened dish cloth on top of them so they won’t dry out or form a crust while they are proofing. But, that is not always possible, and the bread will be okay if you don’t do that.
The loaves will look like they have softened, rather than doubling again in size or “rising.” They usually look sort of like they fell over a little bit. And that is what you want: Italian loaves are going to be flatter than French baguettes.
Baking
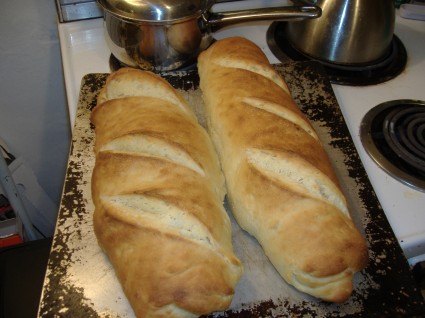
 When you are ready to bake, the loaves will have proofed for an hour, and you will have pre-heated your oven to 500 degrees, also for one hour. You are now going to take a very sharp knife and make three quick slashes into your baguette, diagonal to the loaf. Now, you are ready to bake.
The first thing you are going to do is open your oven door quickly and spray it all over with your spray bottle of water.
Oh? You don’t have a spray bottle of water? In that case, you will want to take a glass baking pan and fill it shallowly with water and put it on your lower oven rack. Do this about 15 minutes before you are ready to bake so there is time to generate steam in the oven: Steam is critical to creating a good crust.
If you do have a spray bottle, shut your oven door as fast as you can after the first spray. Wait five minutes. This time, open the door, put your bread in quickly, and then spray the bread/inside of the oven quickly, then shut the door again. Bake for 5 minutes at 500 degrees.
After 5 minutes, you will spray the oven one last time, and then turn the temperature down to 450 degrees. You will continue baking for 15 minutes. DO NOT OPEN THE OVEN DOOR DURING THIS TIME.
And that’s it! After 20 minutes of baking under those conditions, your bread should be golden brown and lovely. You will want to flip over the loaves and thump them on the back for a hollow sound to determine that they are really done; if not, pop them back in for five minutes and check again. DO NOT CUT INTO YOUR BREAD TO SEE IF IT’S DONE.
When it’s done, let it cool a bit and enjoy!
Next week, we’ll talk about what to do with your bread if something goes wrong… (hint: rhymes with bread pudding!)
My mom, on nights when she didn’t want to cook something complex, would take giant loaves of Italian Bread and make tuna fish sandwiches out of them, with lettuce and tomatoes, slicing each loaf into sections for each of us.
Is it dread fudding, Jen? I love dread fudding!