 This week we’re going to make bagels — from scratch! I will repeat the recipe here, but if you would like detailed instructions on how to make dough from scratch, please see the first post I did for this column.
Look for the recipe after the jump. I want to start by saying that I think the idea of making bagels intimidates a lot of people who might not be all that comfortable with making a yeast bread to begin with. The reason I think this is the incredulous responses I have gotten lately from people when I have mentioned making bagels: Most people think I am toasting them, because they cannot fathom that I mean actually shaping, boiling, and baking bagels myself.
Is it the boiling? The idea of boiling bread dough? Is that what throws people off? Or does it seem like too long and complicated of a process to make the dough, let it rise, punch it down, shape it into bagels, broil them, boil them, top them, and then bake them? It’s not really that long or that complicated of a process, actually.
It does help, however, if you have made your dough ahead of time. For example, if you knew you wanted to make bagels with your family or some friends on a Friday evening, but you have to work all day Friday, you could make your dough on Thursday night. Then, you would cover it tightly in your mixing bowl (because it will rise, albeit more slowly) and put it in your refrigerator until you get home from work. The first thing you want to do when you walk in the door is take that dough out. Then, go about your daily routine and let the dough warm up a bit.
After a half hour or so, you will probably be ready to address that dough, and it will be ready for you, too.
So, first, here’s the recipe:
Recipe
Yield: 9 bagels
__________________________________________________________________________________________
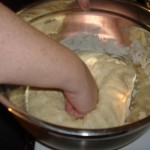
You will make your dough first. You’ll want to mix all of the ingredients together and knead the dough until smooth. Then, let it rise for an hour or two.
Forming your bagels
 You’ll want to punch your dough down to let the air out of it. Then, reshape it into a ball gently and leave it alone for ten minutes while you set your oven to broil, fill a large pot of water and add 1 Tablespoon of sugar.

After your dough has rested for ten minutes, you will want to squeeze off your first bagel. Getting the right size is a little tricky at first. This recipe supposedly makes one dozen bagels. You will notice that I claim it only yields nine. That is because I like a decently-sized bagel. And I strongly advise you not to short-change yourself by making bagels too small because a recipe gives you a yield; it’s much better simply to double your recipe and get a decent bagel. The way to tell if you’re getting a good-sized bagel is to make sure you get about nine evenly-sized bagels. Don’t be afraid to dump the dough all back together if you  think they’re the wrong size.
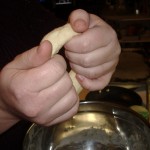
After you have squeezed off the size you want, you want to poke a hole in it with your thumb. Then, use your thumb to make the hole bigger, so you can kind of swing the bagel around on your thumb. That hole is going to close up a little when you do all the broiling, boiling, and baking, so make sure it’s a nice big hole at first.
Spray a cookie sheet with cooking spray, and start laying your bagels on it.
Broiling
Now, you are ready for the broiling part of your bagels. I have read a lot of different bagel recipes. Some of them don’t tell you to broil them; you go straight to boiling. I have made bagels both ways, and I like the little bit of support the broiling gives the dough. But if this is too many steps, then skip it. Instead, you will want to let your bagels rise for maybe 45 minutes before you boil them.
HOWEVER, one of the advantages of broiling them is that they puff up beautifully so you don’t have to let them rise before you boil them, and you will get a more genuine looking bagel. If you choose to just boil, you may lose some of the rising that you’d gain from broiling them. But I cannot stress enough that you are probably, regardless of the choices you make in this instance, going to end up with something delicious and homemade.
Put the bagels into the oven and broil for three minutes. Rotate the tray once during that time, and don’t let the bagels brown on top (if they brown a little, that’s life; don’t toss them out). You can avoid browning by making sure your oven rack is toward the middle of the oven.
Then, set your oven to bake at 350 degrees.
Boiling
 Boiling is what makes a bagel a bagel. Quite simply, boiling gives the bagel its exquisite chewiness. Now, as with the broiling, I have seen and made bagels with differing boiling times. In one recipe, you basically just put the bagels into boiling water for a minute, flipping them once. But I have another recipe, the one I present to you here, in which you boil them, four or five at a time, (flipping once) for seven minutes. Yes, that seems like an obscenely long boiling time — it does to me too. But it works. So, again, baking is an art rather than a science, so if it freaks you out to boil bagels in general, and if seven minutes really freaks you out, then boil them for a minute, flipping them over once, and be done with it. You are still going to end up with something delicious.
As for me and my house, we are boiling for seven minutes, so set your timers. As I stated in the previous paragraph, they won’t all fit at once unless you are a witch with a cauldron. So, pop them into your boiling water about four or five at a time. You’ll probably want to use a slotted spoon to transfer them, but handle them carefully so they don’t deflate.
After they’re boiled, put them back on your baking sheet. We’re almost ready to bake!
Toppings
You can, of course, make plain bagels. Another choice you have here is to make a little egg wash to brush the bagels with before you bake them; I personally think this is unnecessary after all that boiling. But to make an egg wash for shiny bagels, you just take an egg and beat it a little with a fork in a small bowl, adding just about a teaspoon of water to it. Then, use a paper towel or a pastry brush to glaze the bagels.
 The next part, the really fun part, is adding toppings to the bagels, if you want something besides plain bagels. We like to have a number of things on hand: Kosher salt; sesame seeds; poppy seeds; asiago cheese. But you could do a cinnamon/sugar mixture too. Basically, your imagination is probably your limit.
Once you’ve topped the bagels, you are ready to bake them. What I’ve learned is that a recipe may tell you that they will be done in 25-30 minutes. After all that boiling though? They actually need to bake for more like 45 minutes, until they are golden brown. So, I’d check them at 25-30 minutes, and then continue baking for another 15 minutes.
 You sort of have to trust me on this: You’ll know they’re done. Because they will look like amazing, delicious bagels that you want to eat. Before they are finished, they will look sort of iffy. But if you are really unsure and don’t appreciate my wishy-washy nature, then I’d say pick one up, flip it over, and tap it. Listen for a hollow sound. Or, sacrifice one and break it apart to see if it’s done. And after you sacrifice it, you should slather it with cream cheese and eat it.
I would like to say here: If you have questions, please feel free to leave a comment. I will be happy to answer them for you. Also, if you have a particular type of bread you’d like me to focus on for this column, I will be happy to do that too — and if I have no experience with it personally, I will get some. One of the things I’d like to focus on in coming weeks is gluten-free bread. I have never made it, but I have a friend with a wheat allergy who is suffering because she can’t eat any of the bread I make.
 In the meantime, tune in next week for Italian bread!